Meta Description: Learn how to organize your Mac desktop once and for all — Stacks, folder structure, Tags, and automation tips that actually stick in 2026.
Slug suggestion: how-to-organize-mac-desktop
Every Mac user has been there. You sit down to actually work, and your desktop looks like someone emptied a filing cabinet onto it. Screenshots you don't remember taking. Three copies of the same PDF with slightly different names. A folder called "Stuff" that hasn't been opened since last year.
You've cleaned it before. Maybe even twice. It didn't stick, because the problem was never the mess — it was the system behind it. Or rather, the lack of one.
The real reason your Mac desktop keeps getting messy isn't laziness. It's decision fatigue. Every time you save a file, your brain has to answer: where does this go? And when there's no obvious answer, the desktop wins by default.
This guide gives you a system that eliminates most of those decisions. It takes about fifteen minutes to set up, and once it's running, your desktop stays clean without you thinking about it.
Quick Answer
To organize your Mac desktop in 2026: (1) clear everything off and enable Stacks as a safety net, (2) create a simple three-folder structure (Inbox, Projects, Archive) and pin them to your Finder sidebar, (3) set up Smart Folders so files surface by type without manual sorting, and (4) automate ongoing cleanup with Hazel or macOS Shortcuts. The goal is to reduce decisions, not add chores.
Table of Contents
- The Real Problem: Every Save Is a Decision
- Step 1: Clear the Deck
- Step 2: Turn On Stacks as Your Safety Net
- Step 3: Build the Three-Folder System
- Step 4: Make Finder Actually Useful
- Step 5: Use Smart Folders to Find Without Filing
- Step 6: Use Tags — But Only Four
- Step 7: Automate It So It Stays Clean
- Before vs After
- FAQ
The Real Problem: Every Save Is a Decision
The desktop is the path of least resistance. Every screenshot lands there by default. Every "Save As" dialog opens there. Every drag-and-drop from a browser defaults there.
Most organization guides tell you to "just be more disciplined." That's like telling someone to just eat healthier without changing what's in the fridge. You have to change the defaults — redirect where files go, reduce how many decisions you make, and let macOS do the sorting work it was designed to do.
macOS Sequoia actually has excellent organization tools built in. Most people just don't know they exist, or they've been using Finder the same way since 2015. Here's the system.
Step 1: Clear the Deck
Don't try to organize in place. You'll spend an hour deciding what each file is and give up halfway through. Instead, do a hard reset.
- Create a new folder in
~/Documentscalled Desktop Archive 2026-04. - Select everything on your desktop (
⌘ A) and drag it into that folder. - Your desktop is now empty.
- You'll sort this archive folder later — or never. Both are fine. The point is that you've removed the visual noise and the guilt that comes with it.
This works because it's psychologically safe. Nothing is deleted. Everything is recoverable. But the mental load drops to zero immediately.
Step 2: Turn On Stacks as Your Safety Net
Before building anything else, enable Stacks. This is macOS's built-in desktop grouping — it automatically clusters files on the desktop into tidy piles by type.
- Right-click anywhere on the desktop.
- Choose Use Stacks.
- Right-click again, go to Group Stacks By → Kind.
Now any stray file that does land on the desktop gets auto-grouped: all screenshots collapse into one pile, all PDFs into another. It won't solve the root problem — files are still on the desktop — but it buys you time and keeps things visually sane while the rest of the system takes over.
Step 3: Build the Three-Folder System
The single biggest mistake people make is creating too many folders. A 40-folder hierarchy works for about a week, then breaks the moment you're busy and can't decide where something goes.
You need exactly three folders:
- Inbox — every new file lands here. Downloads, screenshots, email attachments, random saves. This is your single landing zone.
- Projects — active work. One subfolder per project, nothing more.
- Archive — anything older than 30 days that you're not actively using but might need someday.
Create these inside ~/Documents. That's your entire structure.
Pro tip: Redirect your defaults immediately. Change your browser's download location toDocuments/Inbox(Chrome: Settings → Downloads → Location). Set screenshots to save there too (⌘ ⇧ 5 → Options → Other Location → Documents/Inbox). Now the single biggest source of desktop clutter — screenshots and downloads — flows directly into your Inbox instead.
Why three folders work when forty don't
Every file decision becomes binary: "Is this active or not?" Active → Projects. Not active → Archive. New and unsorted → it's already in Inbox. You never have to think "does this go in Receipts or Finance or Taxes or Misc?" That decision paralysis is what killed every previous system.
Step 4: Make Finder Actually Useful
Most people use Finder with default settings they've never touched. Five minutes of customization turns it from an annoyance into a command center.
Show the full interface
Open Finder and enable everything:
- View → Show Path Bar — see the full folder path at the bottom of every window. You'll always know exactly where you are.
- View → Show Status Bar — see how many items are in the current folder and available disk space.
- View → Show Tab Bar — open multiple folder locations as tabs, like a browser.
Pin your three folders to the sidebar
Drag your Inbox, Projects, and Archive folders directly into the Favorites section of the Finder sidebar. Now they're one click away from anywhere in Finder — no navigating through Documents every time.
To clean up the sidebar further: go to Finder → Settings → Sidebar and uncheck locations you never use (AirDrop, Movies, Music, etc.). A clean sidebar means less visual noise and faster navigation.
Set a better default view
Open your Inbox folder, press ⌘ J (View Options), and set:
- Sort By: Date Added (newest first — you always want the most recent files on top)
- View: List view (
⌘ 2) for Inbox and Archive, Gallery or Column view (⌘ 3/⌘ 4) for Projects
These view options stick per-folder, so each folder can look different based on how you use it.
Step 5: Use Smart Folders to Find Without Filing
This is the feature most Mac users have never heard of, and it changes everything.
Smart Folders are saved searches that look like real folders. They auto-populate based on rules — without moving any files. A Smart Folder called "Recent PDFs" will always show every PDF added in the last 7 days, no matter where it lives on your Mac.
Set up three essential Smart Folders
- Open Finder and press
⌘ ⌥ N(File → New Smart Folder). - Click the + button to add search criteria.
Smart Folder 1: Recent Downloads
- Rule: Date Added is within last 7 days
- Rule: Kind is not Folder
- Save as "Recent Downloads" and check "Add to Sidebar"
Smart Folder 2: All PDFs
- Rule: Kind is PDF
- Save as "All PDFs" → Add to Sidebar
Smart Folder 3: Large Files
- Rule: File Size is greater than 100 MB
- Save as "Large Files" → Add to Sidebar (great for periodic cleanup)
These Smart Folders appear in your sidebar alongside your real folders. The beauty is that files don't need to be "in the right place" for you to find them — the Smart Folder pulls them from everywhere automatically.
Step 6: Use Tags — But Only Four
macOS Tags let you color-code files across every folder. They're powerful, but most people either ignore them or create so many that they become another source of decision fatigue.
The fix: pick exactly four tags and assign each a clear meaning.
- Red → Urgent — needs attention today.
- Blue → Work — client or professional files.
- Green → Personal — non-work files worth keeping.
- Yellow → Receipts — invoices, purchases, tax-related.
To tag a file: right-click → Tags → pick a color. Or drag a file onto a tag name in the Finder sidebar.
Tags work independently of folders. A file can live in your Archive but still be tagged Red if it's suddenly urgent again. You get two dimensions of organization: *where* something is (folder) and *what* it means (tag). That's more than enough.
Step 7: Automate It So It Stays Clean
This is where most cleanup guides fall apart. They tell you to manually sort your Downloads every Friday. You won't. Nobody keeps that up.
The fix is automation — set it up once and let it run forever.
Option 1: Hazel ($42, one-time)
Hazel is the gold standard for Mac file automation. Point it at your Inbox folder and set rules:
- Move images older than 7 days to
Archive/Images/ - Move PDFs to
Archive/PDFs/ - Move ZIP files to
Archive/Archives/ - Move files larger than 500 MB to
Archive/Large/
Hazel runs silently in the background. It handles renaming, tagging, and sorting with deep macOS integration. For most people, it pays for itself within the first week.
Option 2: macOS Shortcuts (free, built-in)
Create a shortcut that:
1. Gets all files in Documents/Inbox
2. Filters by file type
3. Moves each group to the right subfolder in Archive
Trigger it from the menu bar, set it as a scheduled automation, or bind it to a keyboard shortcut. It's less automatic than Hazel — you still have to trigger it — but it costs nothing.
Option 3: Automator folder actions (free, built-in)
For a true set-and-forget free option: open Automator, create a Folder Action attached to your Inbox folder, and add a "Move Finder Items" action that sorts by file type. It runs automatically whenever a new file lands in the folder.
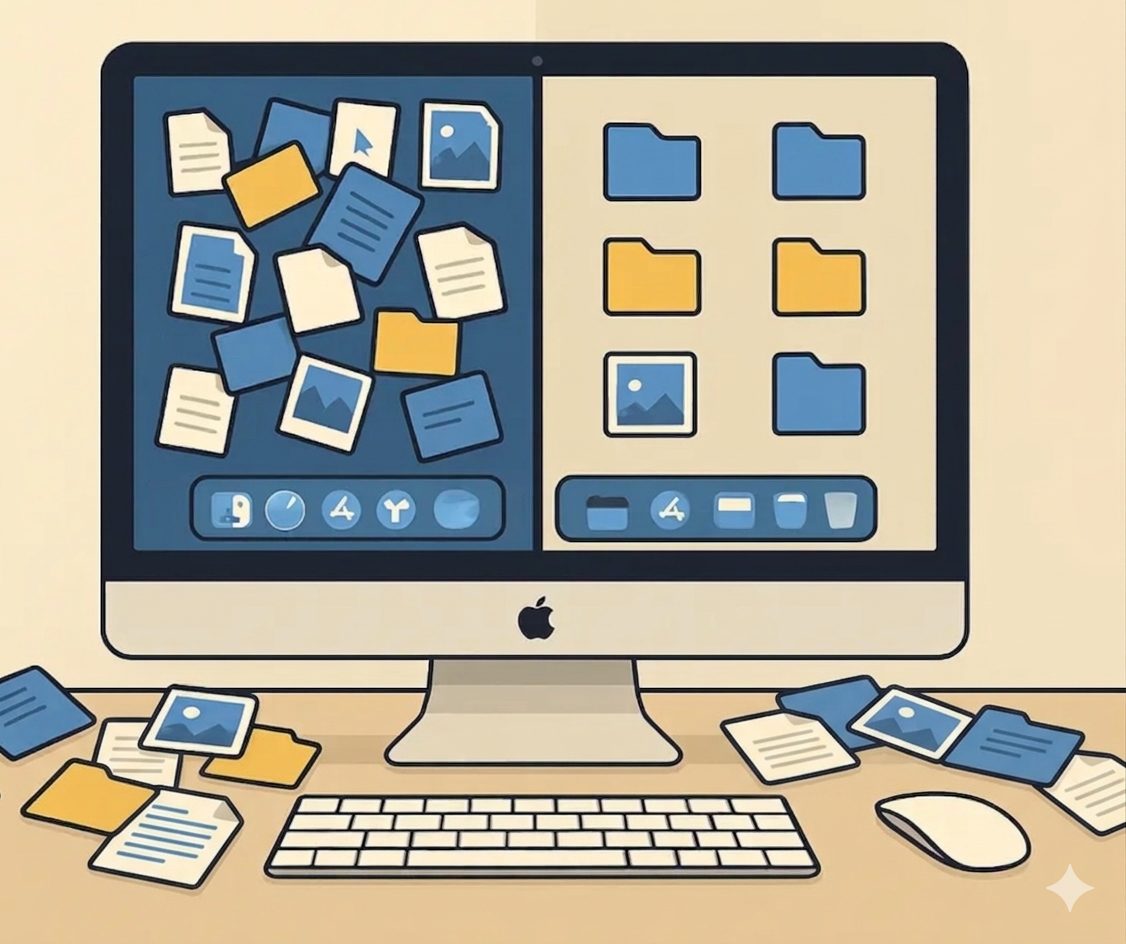
Before vs After
Before:
~/Desktop/
  Screenshot 2026-03-14 at 10.42.11.png
  Screenshot 2026-03-14 at 10.43.02.png
  Invoice_final_FINAL_v3.pdf
  Untitled.png
  resume.pdf
  resume (1).pdf
  IMG_4821.jpeg
  meeting-notes.txt
  logo-draft.sketch
  ... 87 more files
After:
~/Desktop/
  (empty — Stacks enabled as safety net)

Finder Sidebar:
  Inbox/          ← all new files land here
  Projects/       ← one subfolder per active project
  Archive/        ← auto-sorted by Hazel or Automator
  Recent Downloads ← Smart Folder (last 7 days)
  All PDFs        ← Smart Folder (all PDFs, everywhere)
  Large Files     ← Smart Folder (100 MB+)
Same files. Zero mental overhead.
Keeping It Clean Long-Term
The system survives because it respects how your brain actually works:
- No decisions on save. Everything defaults to Inbox. You never have to think "where does this go?" in the moment.
- Automation handles sorting. Hazel, Shortcuts, or Automator moves files from Inbox to Archive by type — automatically.
- Smart Folders handle finding. You don't need to remember where you filed something. Search criteria find it for you.
- Weekly review is 30 seconds. Glance at Inbox. Anything active? Move to Projects. Everything else is already archived.
The secret isn't discipline. It's removing the need for discipline in the first place.
Conclusion
You now know how to organize your Mac desktop the right way — not just clean it once, but build a system that stays clean. Clear the deck, enable Stacks, build three folders, customize Finder, add Smart Folders, set up four tags, and automate the sorting.
The entire setup takes about fifteen minutes. After that, the maintenance is effectively zero. Your files go where they're supposed to go, Finder shows you what you need, and your desktop stays empty.
The goal was never to become more organized. The goal was to stop thinking about organization entirely.
FAQ
Q: How do I keep my Mac desktop clean automatically?
A: Redirect your default save locations (browser downloads, screenshots) to a single Inbox folder inside Documents. Then use Hazel, macOS Shortcuts, or Automator folder actions to auto-sort files from Inbox into categorized subfolders. The desktop stays empty because files never land there in the first place.
Q: What is the fastest way to organize files on a Mac?
A: Move everything off the desktop into a dated archive folder (two minutes). Create three folders — Inbox, Projects, Archive — and pin them to your Finder sidebar (three minutes). Set up two Smart Folders for recent downloads and PDFs (five minutes). Total: ten minutes.
Q: What are macOS Smart Folders?
A: Smart Folders are saved searches that look like regular folders in Finder. They auto-populate based on rules you set — like "all PDFs" or "files added in the last 7 days" — without moving any files. They update automatically and can be pinned to your Finder sidebar for one-click access.
Q: Does macOS have a built-in desktop organizer?
A: Yes — macOS Stacks groups desktop files by type, date, or tag automatically. It's useful as a visual safety net, but it doesn't move files off the desktop. For a full system, combine Stacks with a folder structure, Smart Folders, and automation via Shortcuts or Automator folder actions.
Q: Should I delete files from my Mac desktop or just move them?
A: Move, don't delete. Create a dated archive folder in Documents and sweep everything there. You'll almost never open it again, but knowing nothing is lost makes the cleanup psychologically painless — which is why this approach actually sticks long-term.